How to Rebuild a PDF Requiring Special Processing
Prerequisites
This process requires the use of Adobe Acrobat Pro running on a Microsoft Windows workstation. The user procedure for Special PDF Processing is presented as follows.
To Process a Special PDF:
-
Open the PDF file requiring special processing within Adobe Acrobat Pro.
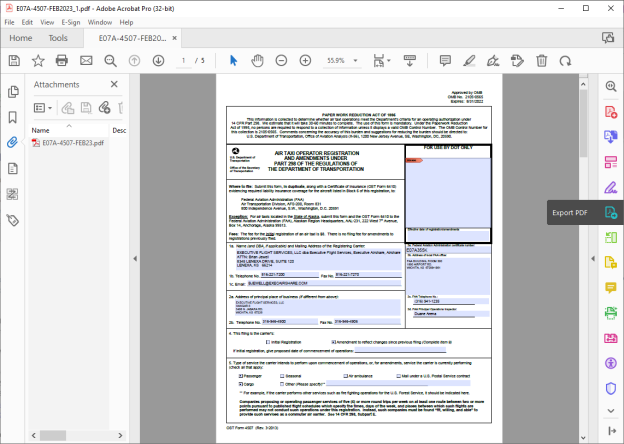
Adobe Acrobat Pro with original PDF requiring Special Processing.
-
Select the Export PDF command by clicking the toolbar’s “Export PDF” button/icon.
The system displays the Acrobat Pro’s Export PDF dialog box (“Export your PDF to any format” as the dialog box title).
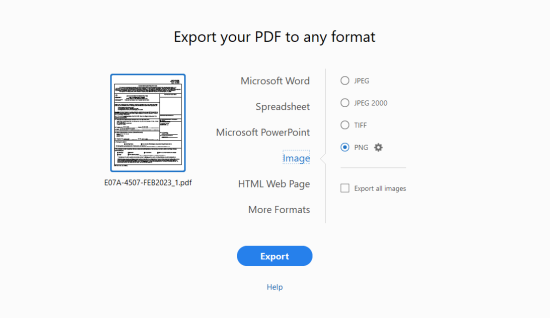
Export PDF dialog box (Acrobat Pro).
-
Select “Image” using the list of formats displayed on the left side of the dialog box.
The system updates the dialog box to display the image file types list displayed on the right.
-
Select “PNG” using the list of image file types displayed on the right side of the dialog box.
-
Click the Export button.
The system displays the Save As dialog box.
The file type (“Save As type” field) is preselected as “PNG”, and an initial File name value is preselected using the source PDF’s file name (Note: Do not change this File name value).
-
Use the Save As dialog box to navigate to a folder, or, if needed, create a new folder (Note: This folder will be used for the entire Special PDF process).

Save As dialog box (from Acrobat Pro).
-
If needed, use the Save As dialog box’s “Settings” button and the displayed Save As PNG Settings dialog box to adjust the parameters used during the export process (Note: The default values are acceptable for this Special PDF process. The following graphic, presented for reference purposes, reflects the values set for the dialog box’s fields and controls when using default settings). Clicking the OK button closes the Save As PNG Settings dialog box and returns to display of the Save As dialog box.
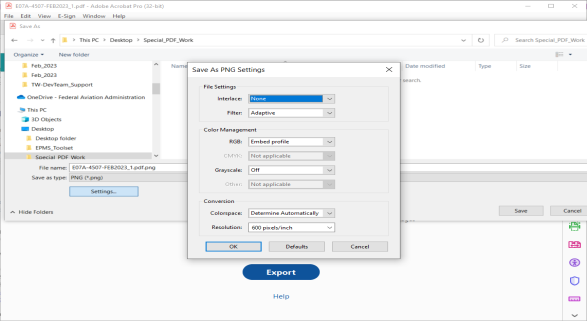
Settings dialog box for PNG - Save As dialog box (from Acrobat Pro).
-
Click the Save button to start the Save as PNG process.
Adobe Acrobat Pro performs a Save process for each page of the PDF file, generating a new PNG image for each PDF page and, during the process, displaying a Saving as PNG progress message box (with sequential display of page numbers) in the bottom right corner of the Acrobat screen’s display area.
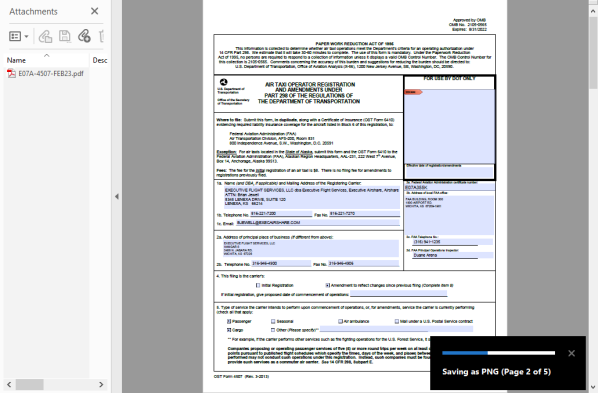
Adobe Acrobat Pro during Save As PNG process.
When the Save As process has completed, Acrobat Pro will display the destination folder using Window Explorer.
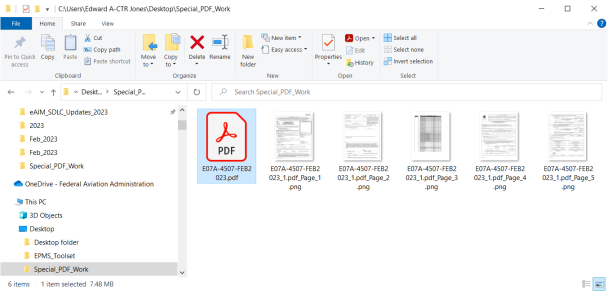
The destination folder displays a thumbnail image icon for each PNG created for each PDF page, and Windows Explorer sorts the icons from left to right using the file name (with increasing alphanumeric order used by default). The file names for each PNG reflect the sequence of “Page” number assignments that Acrobat Pro generated during the Save As process (with these page numbers appended to the original PDF file name).
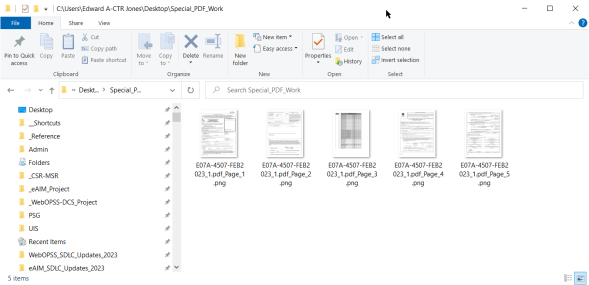
Windows Explorer with destination folder and with page PNG files.
-
Select all of the PNG icons contained in the destination folder. You can use the mouse to drag/select (block select) or use Control + Left mouse click to select each of the icons (Note: Ensure all page icons are selected).
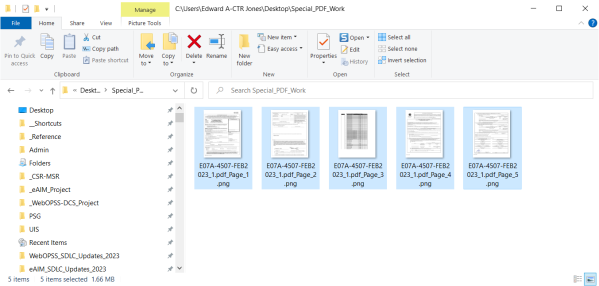
Windows Explorer with page PNG files selected.
-
Right-click the selected group of page icons and select the “Combine file in Acrobat… menu item.
The system queues all of the selected files within Adobe Acrobat Pro’s Combine Files screen, displaying a thumbnail image icon (as a small document page image) for each PNG.
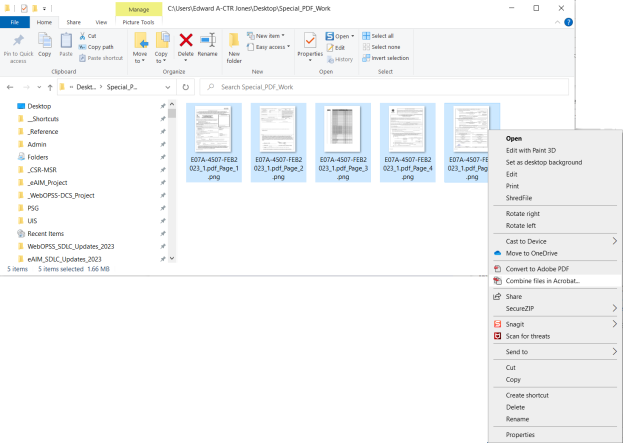
Windows Explorer with right-click menu’s Combine files in Acrobat menu item.
-
Click the Combine button.
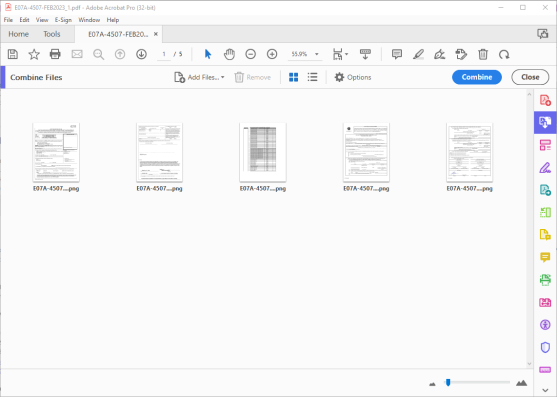
Adobe Acrobat Pro’s Combine Files screen.
Adobe Acrobat Pro performs the Combine process using each PNG image and, during the process, displays a green check mark over each PNG’s thumbnail image icon to indicate that image has been included in the combined file (i.e., indicating the progress for the process).
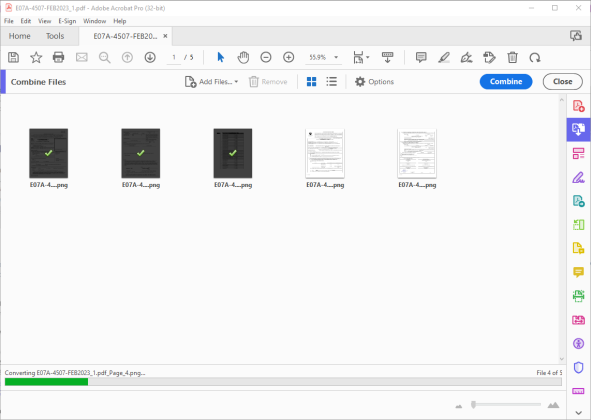
Adobe Acrobat Pro’s Combine Files screen during Combine processing.
When the Combine process has completed, Acrobat Pro displays the new PDF with the new file name that includes the default naming element “Binder”.
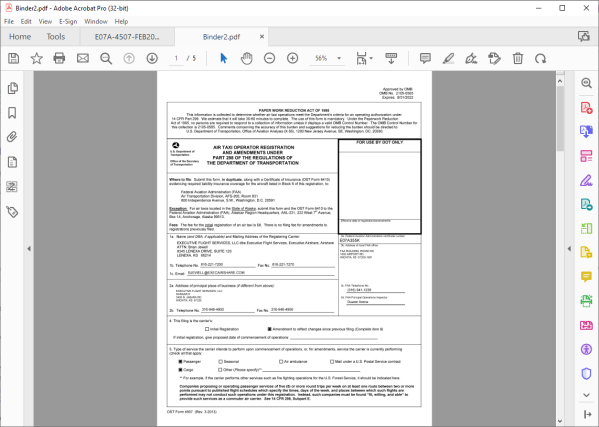
Adobe Acrobat Pro with Combined PDF (default “Binder” naming element).
-
Click the File menu’s Save As menu item.
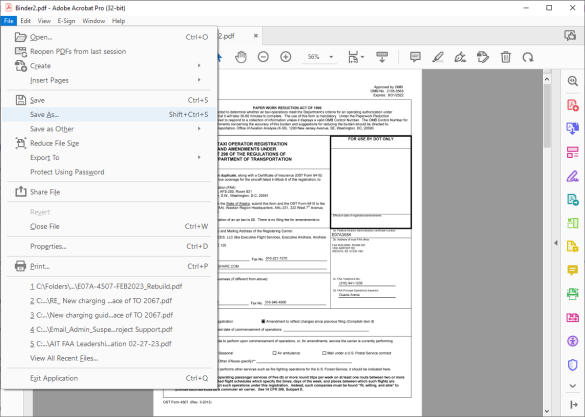
Adobe Acrobat Pro’s File menu and Save As menu item.
-
Use the Save As dialog box to navigate to the destination folder and change the file name to reflect the original PDF file’s file name.
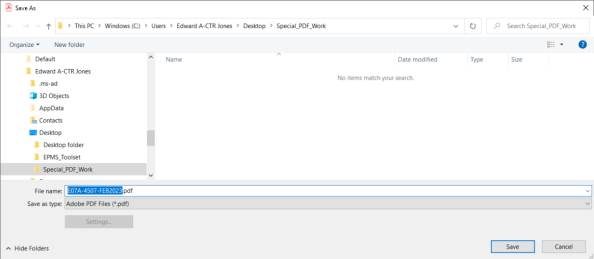
Save As dialog box (from Acrobat Pro).
-
Click the Save button.
Acrobat Pro saves the new, combined PDF file to the destination folder, displaying an icon for the PDF. You can close Adobe Acrobat Pro at this point or repeat the process for another special PDF.
You can now upload the file to the eAIM system.
Windows Explorer with new combined PDF file.